
Winkelwagen
U heeft geen artikelen in uw winkelwagen
With Battlefront bringing the mid-war armies back into focus, we’re continuing our series on painting up armies from the new starter boxes. Today, we’ve got a building and painting guide for the American forces in the Kasserine box.
How paint mid-war Americans – FoW Kasserine
With Battlefront bringing the mid-war armies back into focus, we’re continuing our series on painting up armies from the new starter boxes. Today, we’ve got a building and painting guide for the American forces in the Kasserine box.
Our painting guide today comes from Disastronaut Painting, you can find more of their work here:
https://www.instagram.com/disastronaut_painting/
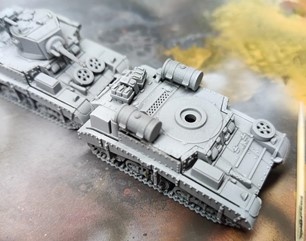
Building & preparation:

Each tank sprue contains enough parts to make a single tank with options for different tank variants.
With the M4 Sherman, you get two 75mm gun/mantlet variants, two options for transmission casing and an open and closed hatch/ There’s also a smattering of accessories including an extra 50. cal, jerry cans, spare track, sand skirts and road wheels.
In the case of the Lee and Stuart, both can be built as either the American versions or the British Grant and Honey variants, including the appropriate turret options with each.
The Lee has both the taller, thinner American turret and the wider, flatter British turret.
The Stuart includes two top hull pieces and viewports with different details, on the surface, they looked fairly similar to one another, and I wasn't sure if once belonged specifically to the honey variant or not, this is a point that I’ll come back to later….
Both these sprues also included extra stowage bits and other accessories, the same as the Sherman. I snipped all the extra stowage out and put them in a pile so I could mix and match.

I am a big fan of battlefronts minis as they combine excellent details for the scale, they are a nice size to paint and do an excellent job of minimising mould lines. That being said one of my kits did have a bit of a mis-mould where it looks partially melted?

These kits were fairly easy to build with a couple of exceptions, I don't recommend using the sand skirts, they were a nightmare to get lined up properly and I was left with quite a few gaps that needed to be filled. The side hull plate of the Stuart did not fit well either, leaving some massive gaps. I highly recommend using patience and elastic bands when fitting either of these parts.
Coming back to the Stuart hulls, I find in these kits there is a lack of context to any other parts, the instructions included in the box, give you instructions to build what the box wants you to build. I did find a link on the Battlefront website giving more detailed instructions on building and found that the extra turret option for the Stuart was for the M3 Satan. This information could be very useful in the box or perhaps a QR code link to the website instructions.
That being said, on the whole, these kits offer a fairly easy building experience and are an excellent value for money for a beginner to Flames of War, just take your time building them and definitely avoid the sand skirts!
A note on building…
Large panel gaps made my Stuarts look more like T-34s! A sneaky trick I used to fill small gaps here is to brush matt varnish into the gap and let it dry and repeat if needed till you have a filled-in gap.
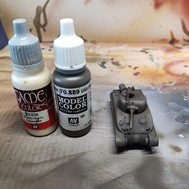
Painting


Vallejo Grey surface primer was applied with an airbrush mixed with a few drops of Vallejo airbrush thinner.


VMC Olive Drab was applied with an airbrush mixed with Vallejo airbrush thinner and Vallejo retarder.


VMC olive drab was mixed 50/50 with VGC Bonewhite and used to highlight prominent regions of the hull from around a 45-degree angle with some highlights focusing on interesting features of the hull and turret I want to draw attention to and create visual interest.


Further highlights were done 75/25 bonewhite to olive drab.

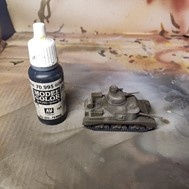

Track and other metal items were painted with VMC German Grey.


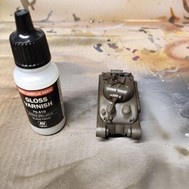
Now that the basic colours are done, we can start with the enamel paints but we need to add a gloss varnish.


Next all the panel lines, rivets and greebles were pin washed, the brush was loaded up and due to the gloss varnish flows nicely into the corners and crevices.


A cotton bud and some turpentine was used to wipe away any excess wash.
Weathering:
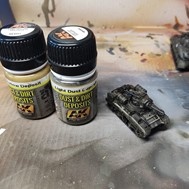


The next step is weathering, AK Sand Yellow Deposits and AK Light Dust deposits were added around any part of the tank that would be covered in dust after fighting and moving through the deserts of North Africa. Much like the pin washing step, once dry turpentine was used to ‘streek’ the grime down the hull panels.

The last step of weathering is using piments to add some chunky bits to the tracks. For this, I liberally brushed on some pigment powder I made from a pastel finely grated on a tea strainer (don't tell my partner) and MiG dry mud. Any excess was brushed away leaving a realistic sandy build up around the tracks.


The tracks were then given a nice dull metallic sheen by rubbing graphite powder over them made with a pencil grated through a tea strainer (again, sorry dear!). This was also done over exposed metal like the 30. cals and 50. cals.


The cloth of the stowage and the tank commander of the Sherman was painted with GW baneblade brown then washed with the ubiquitous agrax earthshade and highlighted back up to baneblade brown.
The final steps were painting the tank commander's face and hat, with VGC basic skin tone VGC armour brown both then washed with army painter flesh tone.
I decided that the weathering had darkened the miniatures down somewhat, so I gave each a drybrush of VGC Khaki across the more prominent details like the rivets hatches and any hard stowage pieces
(barrel/jerrycans etc) and were done ready to fight the HUN!!

Reacties
Wees de eerste om te reageren...