
Winkelwagen
U heeft geen artikelen in uw winkelwagen
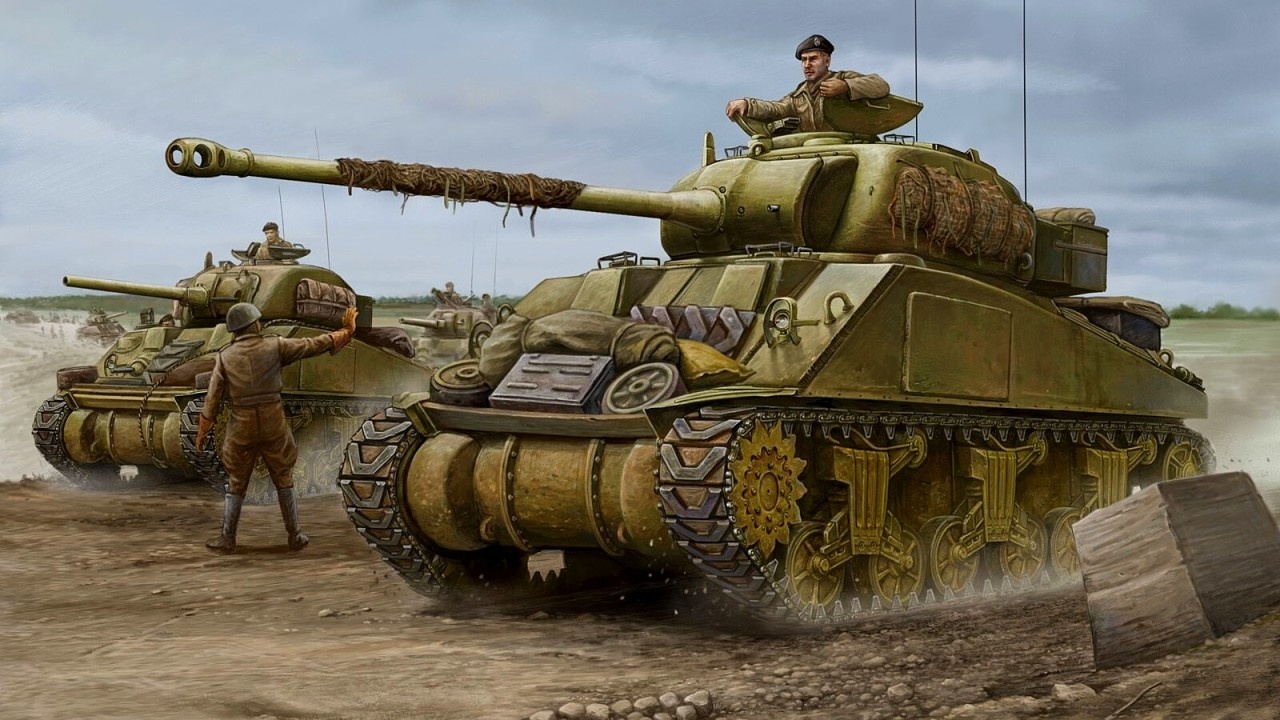
Painting tutorial for British armor used in 1944.
Since winter 2020 I have been working towards a Flames of War army to represent the liberation of my hometown S-Hertogenbosch. The force has steadily been growing, but the paint scheme has remained stable after the first few experiments. And because my process is so consistent I can still add units that would look indistinguishable from the first models.

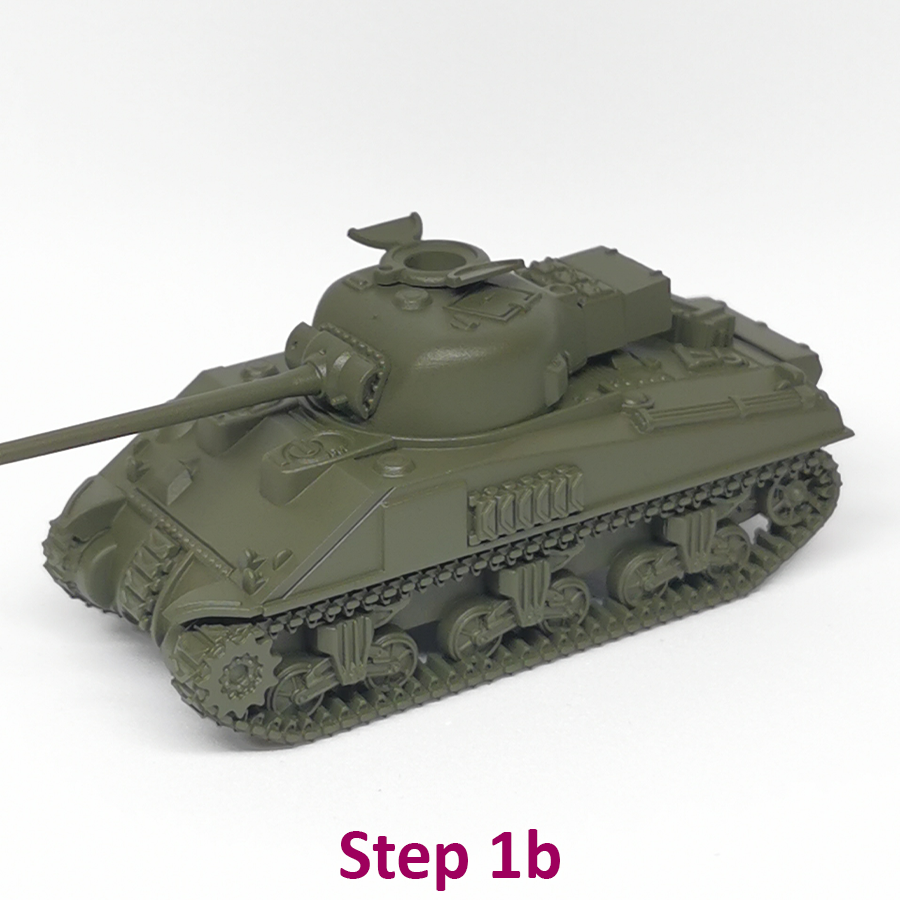
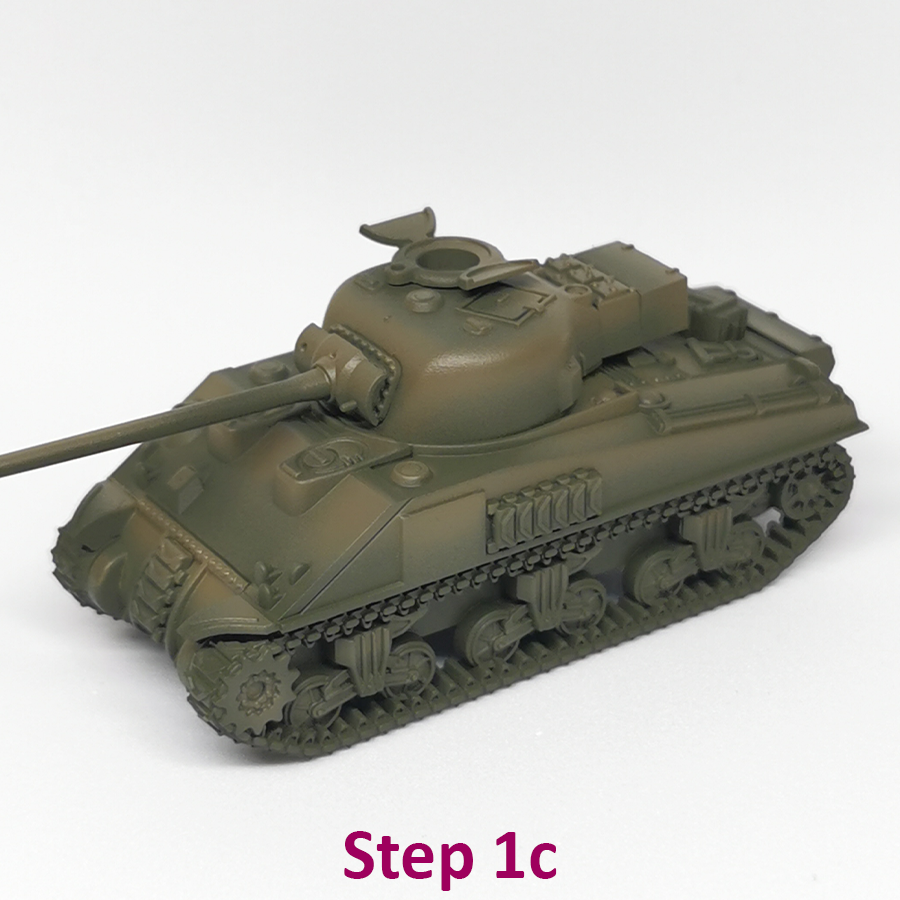
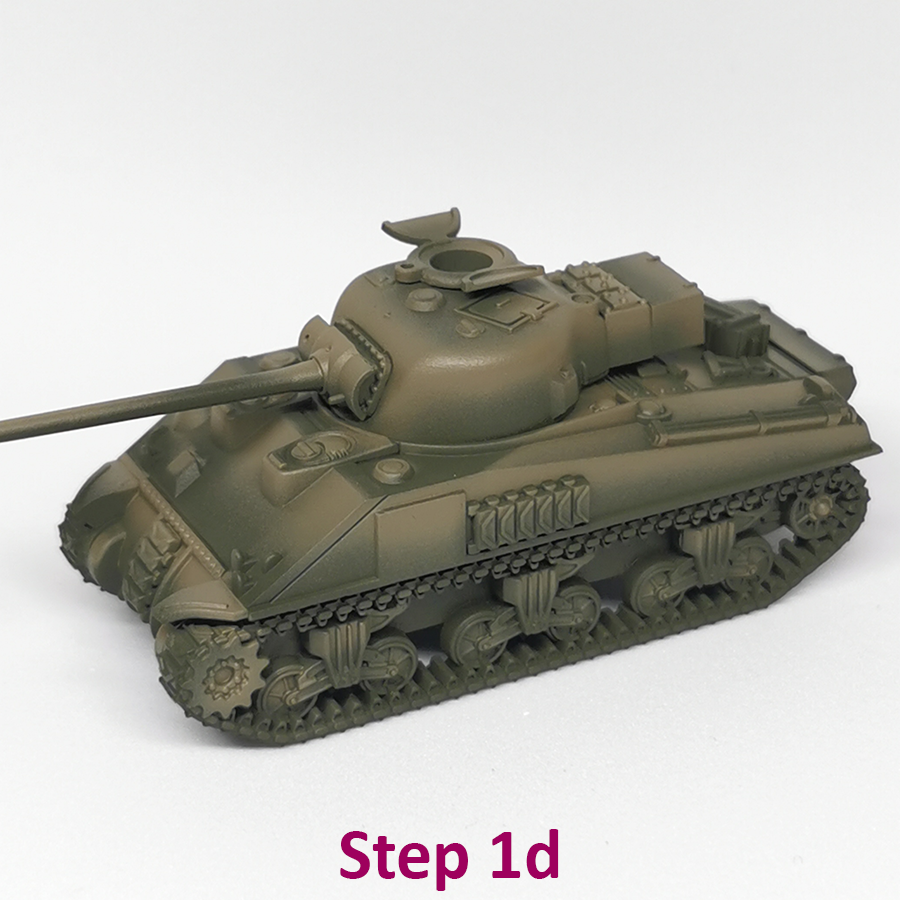
Since these tanks typically did not have camouflage applied, I use modulation to make the armor look interesting before applying any weathering. There are several ways to apply modulation, but it all comes down to creating a gradient of colors on the surfaces of the vehicle, aiming for sharp contrasts where the armor panels meet. Starting with a dark Olive through the airbrush, I build up dark at the front/bottom, to bright in the back/top
Step 1a: Cover the entire model in Olive Drab Dark (A. MIG-925),
Step 1b: Spray SCC15 (A. MIG-112) everywhere but the undersides.
Step 1c: Spray half of every panel with Olive drab light base (A. MIG-927),
Step 1d: Spray a quarter of every panel with Olive drab High lights (A. MIG-928).
Because of the heavy weathering in the following steps, there is no harm in a bit of overspray, but try to get sharp edges where panels meet. A piece of cardboard or blister plastic can help prevent overspray in the critical areas

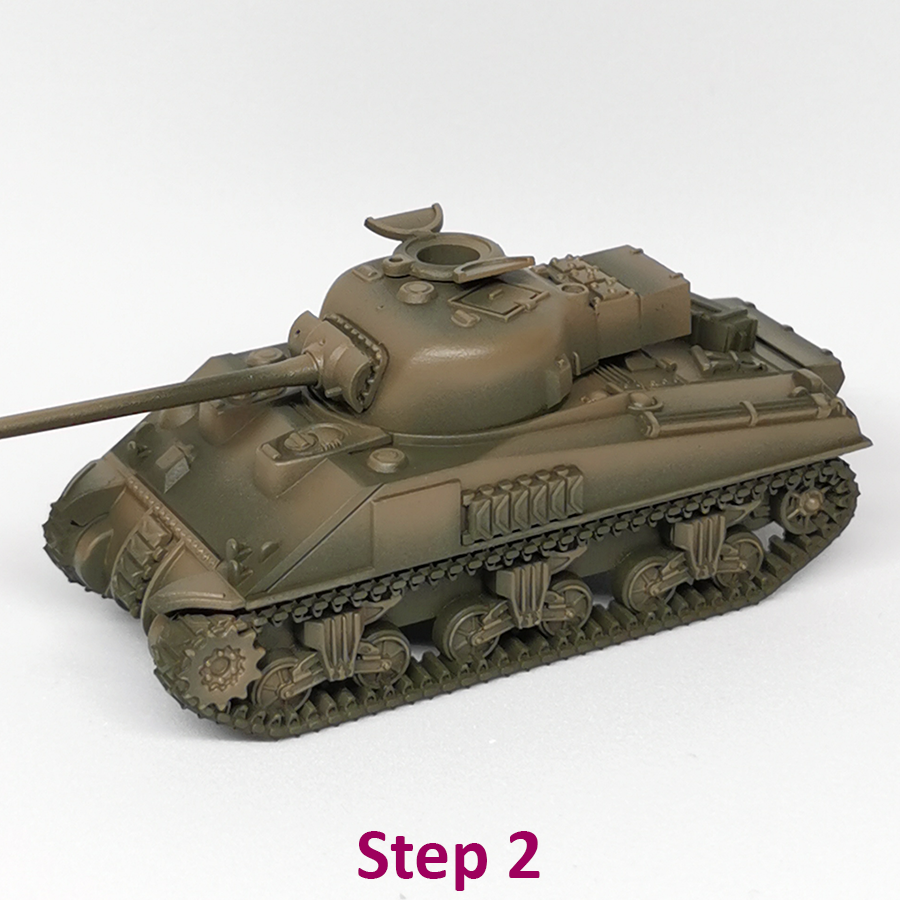
Step 2: To make the details of the tank stand out, highlight details like rivets, optics, and handles with the brightest modulation color Olive drab High lights A. MIG-928. However, do not edge highlight the armor panels.
To protect this base of the paint scheme, I apply a gloss varnish to cover the entire model. My preferred gloss varnish is Alclad II Aquagloss through the airbrush and I varnish a lot during this painting process. After painting dozens of vehicles this way, I’m sure I could take out a few of the varnishing steps, but it does provide me with peace of mind to “save” a step before moving on.
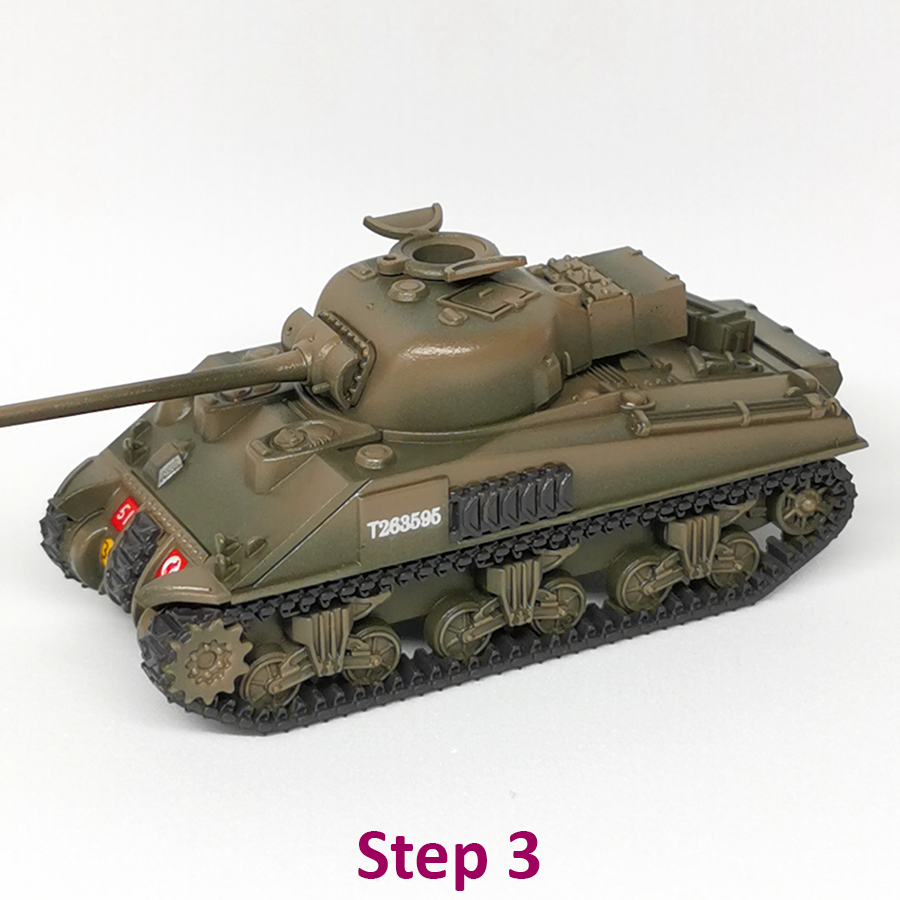
For applying decals, I refer to historic photos to help decide where to place the decals, and I prefer to have a little variation within a platoon. I do this to add variation but also to have a way of distinguishing every platoon. All of this is done before weathering to make sure the decals blend in with the rest of the tank.
STEP 3a: Apply some more gloss varnish by brush to the areas where you intend to stick the decals. Cut the decals out of the sheet and loosen them on a wet paper towel, wait for the water to soak the decal sheet. Prepping and applying sets of decals until all the decals are attached.
Step 3b: When dried, improve the connection with some decal softener (Microscale Microsol) and fixer (Microscale microset). Then once more apply some gloss varnish over the decal and surrounding area. By now the decal should be almost one with the armor plate.
At this moment I also paint the tracks with a base color, a 50/50 mix of Vallejo German Grey (70.995) and Vallejo Saddle Brown (70.940) makes for a nice base for the manganese metal tracks.
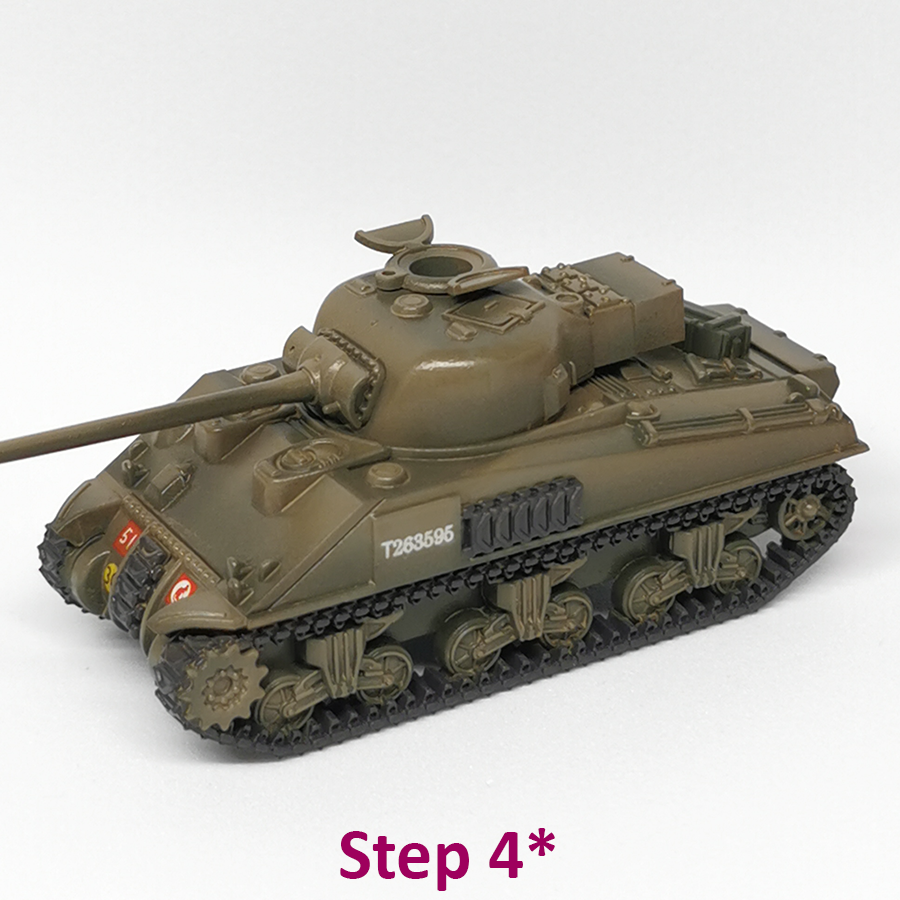
Step 4: To prepare for the enamel filter, Coat the entire model in a satin varnish (AK varnish satin (AK11238). Then brush the entire model in a thin coat of the filter (AK076 Dark brown filter), it should be done thin enough to avoid any pooling. This will bring more life to the color of the tank and bring all the previous steps closer together.
Step 4* My filter dried up more dusty than I expected, but a gloss varnish clears that right up.

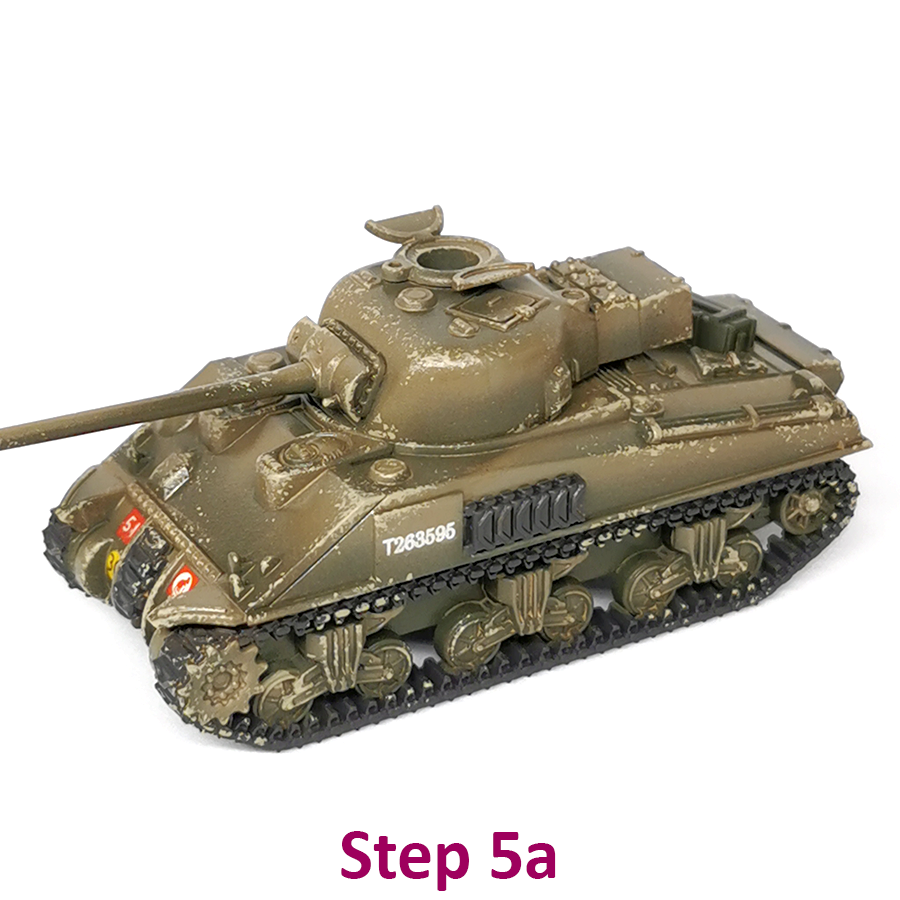
Now that the intended color of the armor is achieved, it’s time to start the weathering. But first I seal the entire model in gloss varnish to protect all the work up until this point. Chipping is the most time-consuming step of this paint scheme and is done in 3 steps; Sponge, Connect, fill.
Step 5a: Apply Chipping with a sponge on some 50/50 Olive drab High lights / Vallejo dead flesh (72.035). Focus on the areas where you would expect to scratch and chip, so around hatches and other edges where the crew will wear off the paint.
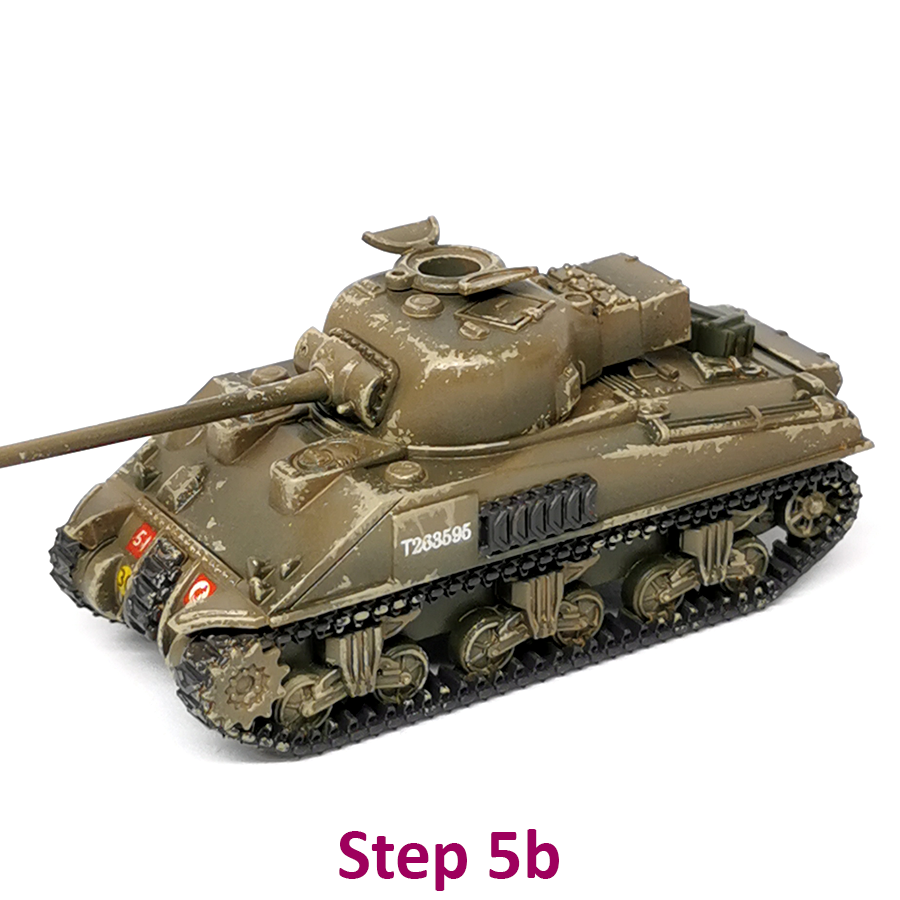
Step5b: Connect the micro scratches into bigger patches with the same paint mix, this helps the sense of paint flakes rubbing off the tank.
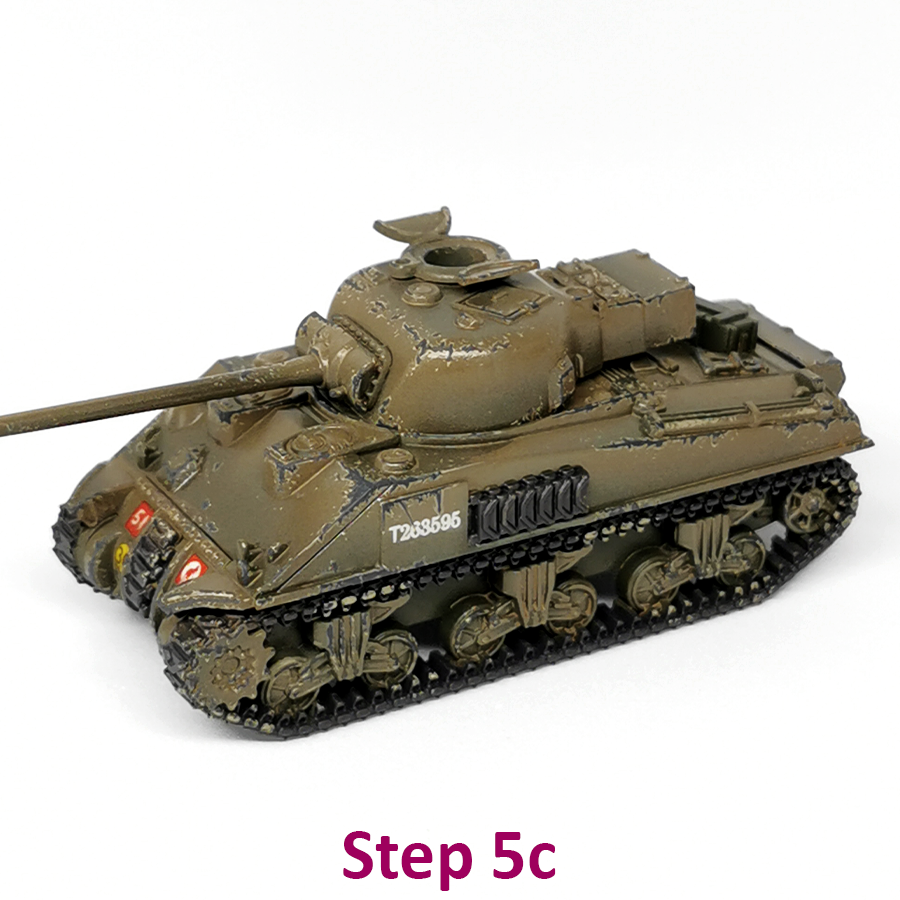
Step 5c: Fill in the light patches with Vallejo German Grey (70.995), leaving a tiny line of light green to represent the chip edge.
The chips might be considered unrealistically big, but this helps sell the effect on the table. This model is chipped relatively heavy to properly show the workflow, I would advise reducing the chipping to a few key spots across the tank when trying it yourself.
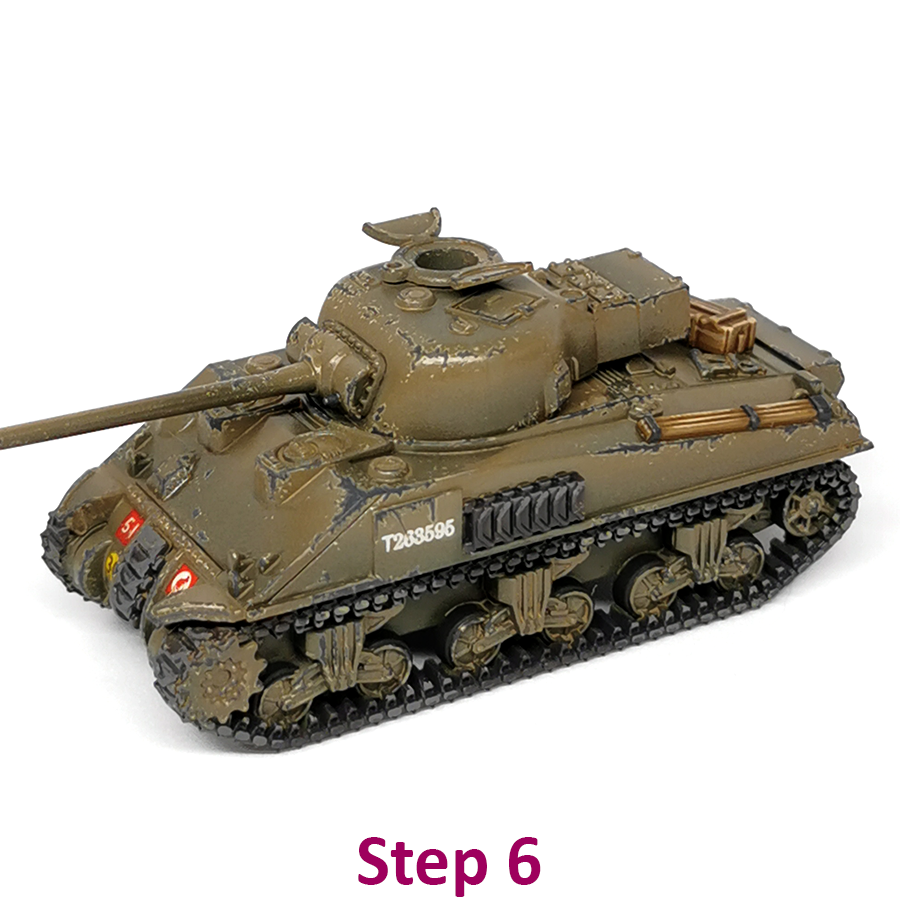
Step 6: Paint all of the details on the tank. Machine Guns, tracks, and stowage. Make sure these are all done before moving on with enamel washes.
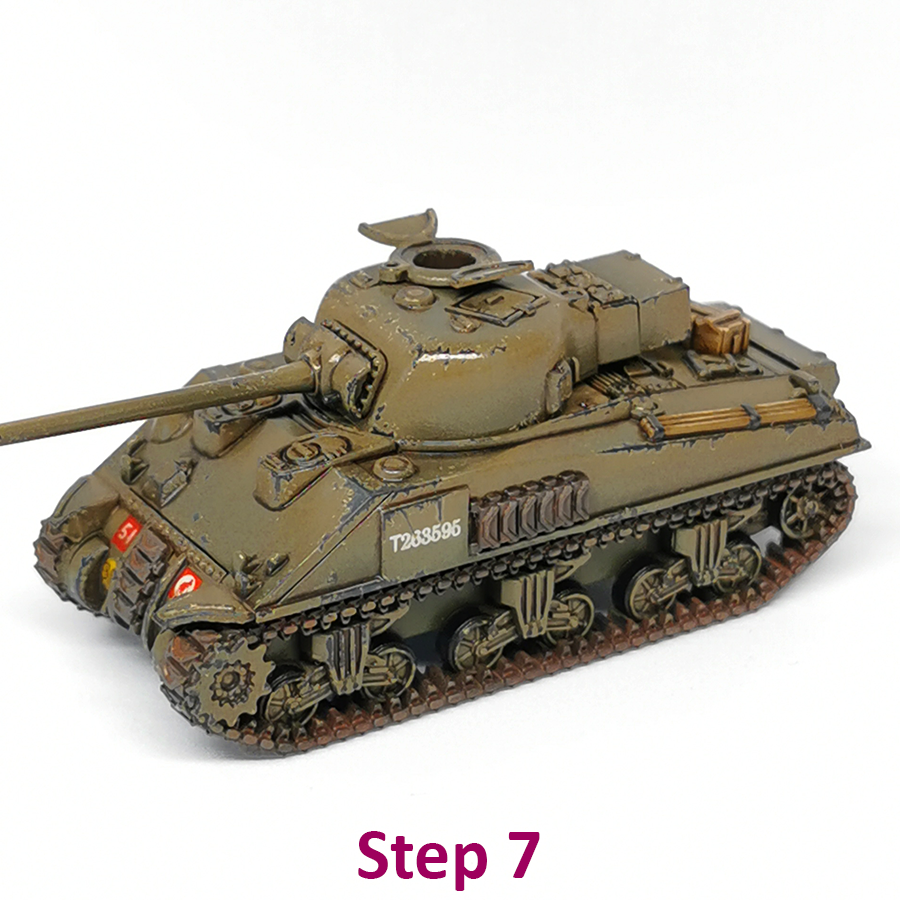
Once again I protect the time-intensive chipping with a layer of gloss varnish. At this moment the model still looks flat due to the lack of panel lines and shadows.
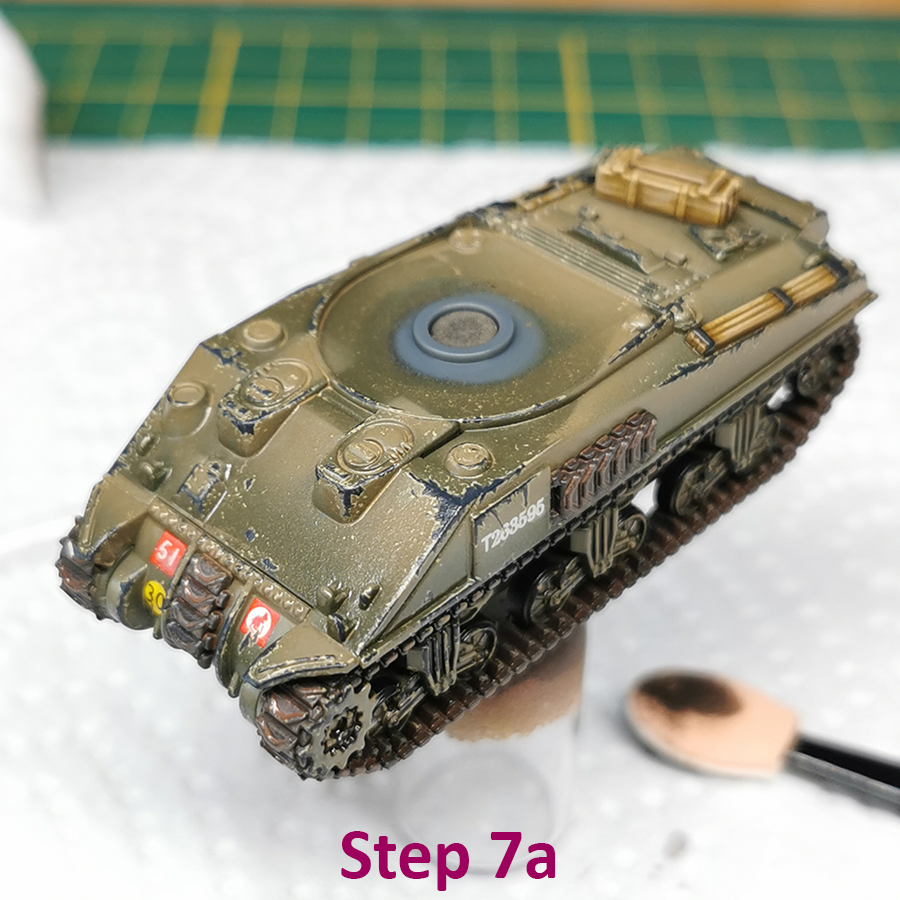
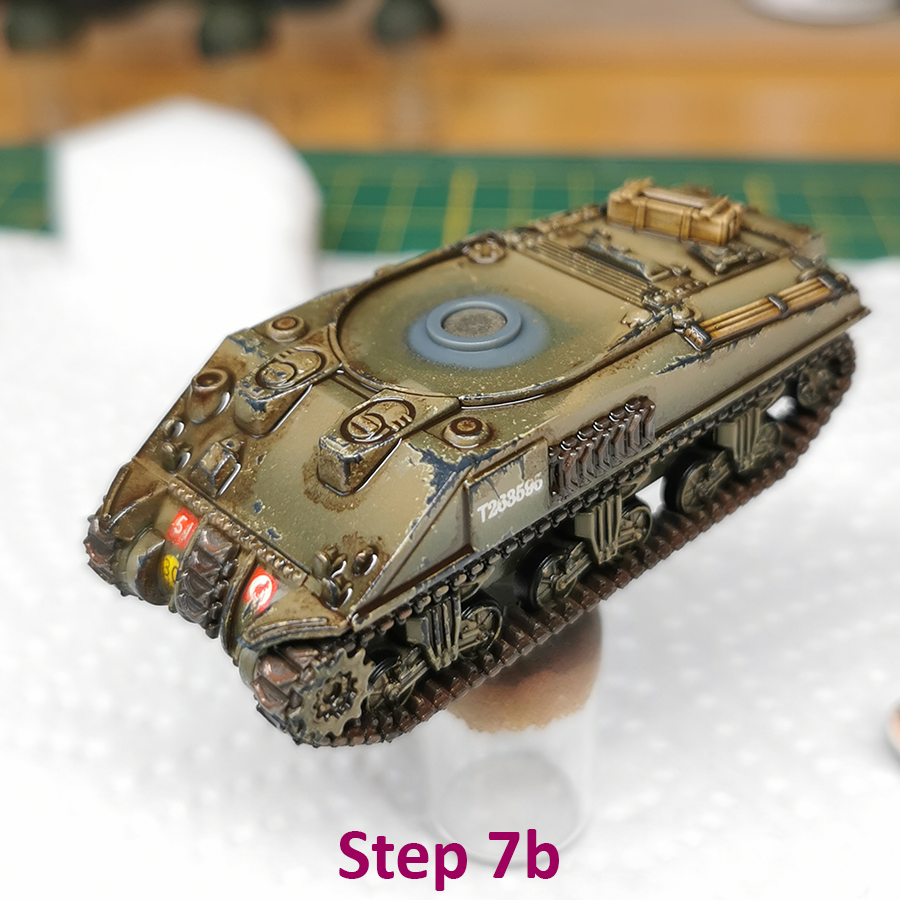
Step 7a-b: Pinwash all the details with AK wash Dark Brown (AK 045), thinned with some white spirit. Touching any detail with a filled details brush will have the wash draw itself into all the recesses through capillary action. It is a lot of fun but can get a bit messy.
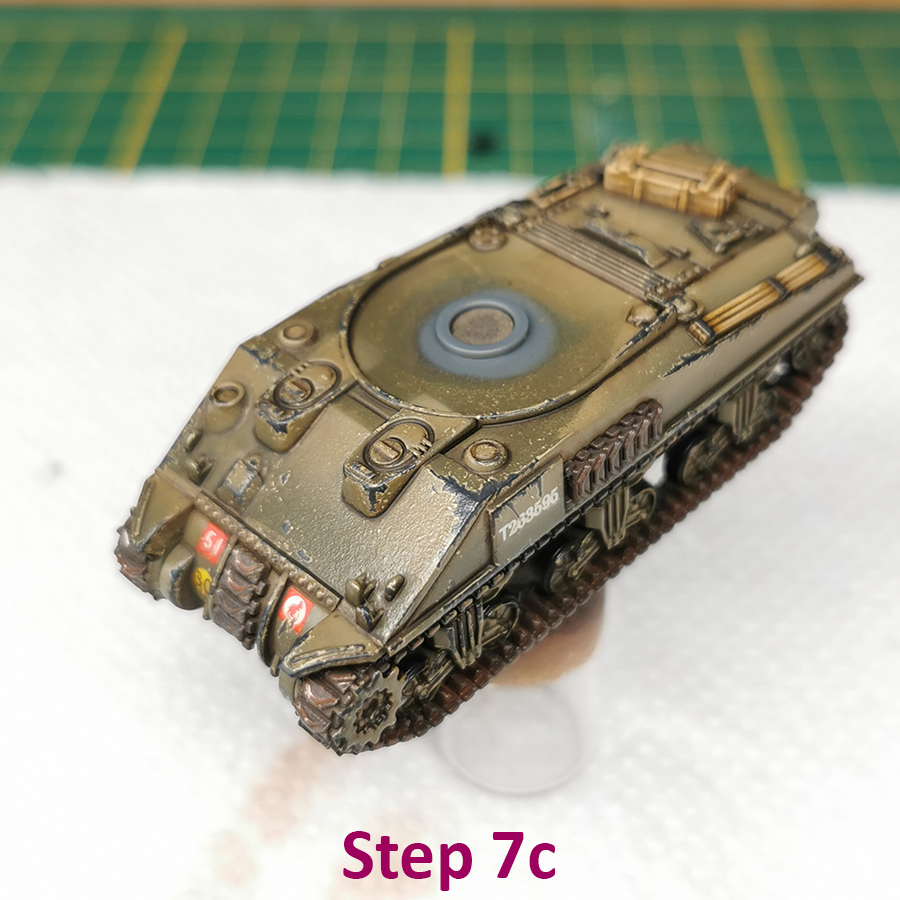
Step 7c: After letting the wash dry for 15-30min, go back with a rag, a makeup sponge, and some white spirit and clean up any wash that stains the flat surfaces.
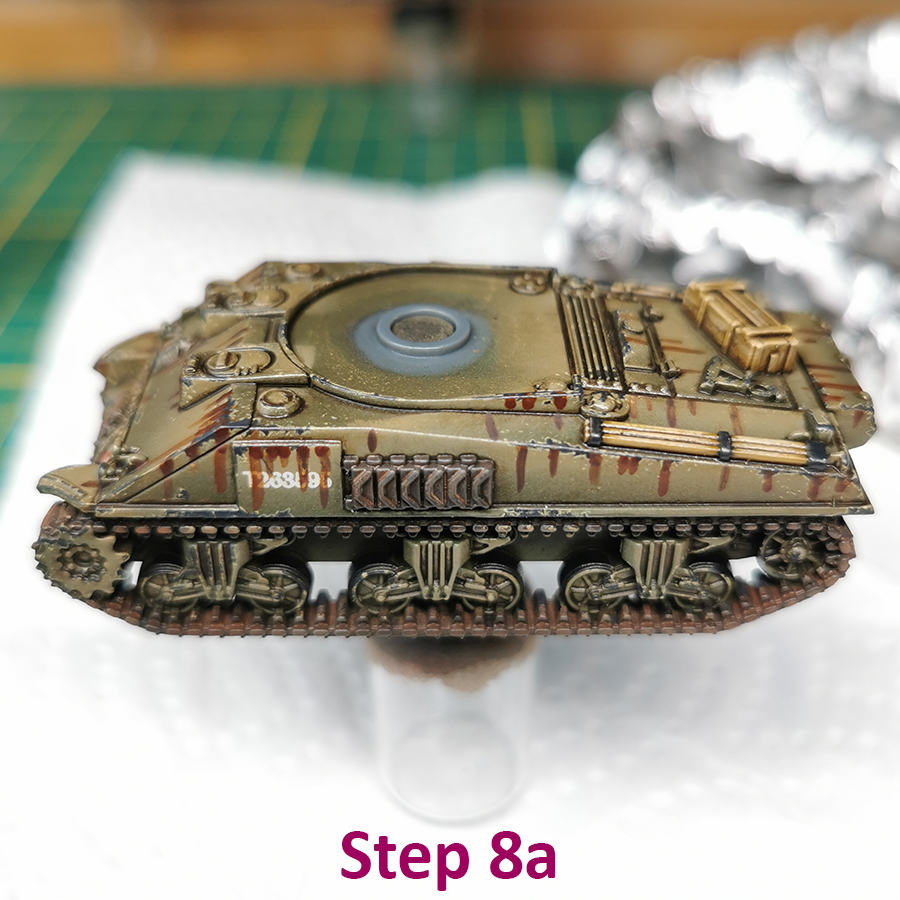
To create the sense of water and dirt running down the tank during the typical Dutch fall season (A lot of rain), I apply a streaking effect to the vertical panels. Seal the model with a gloss varnish before streaking to protect the previous wash from being removed during the streaking process.
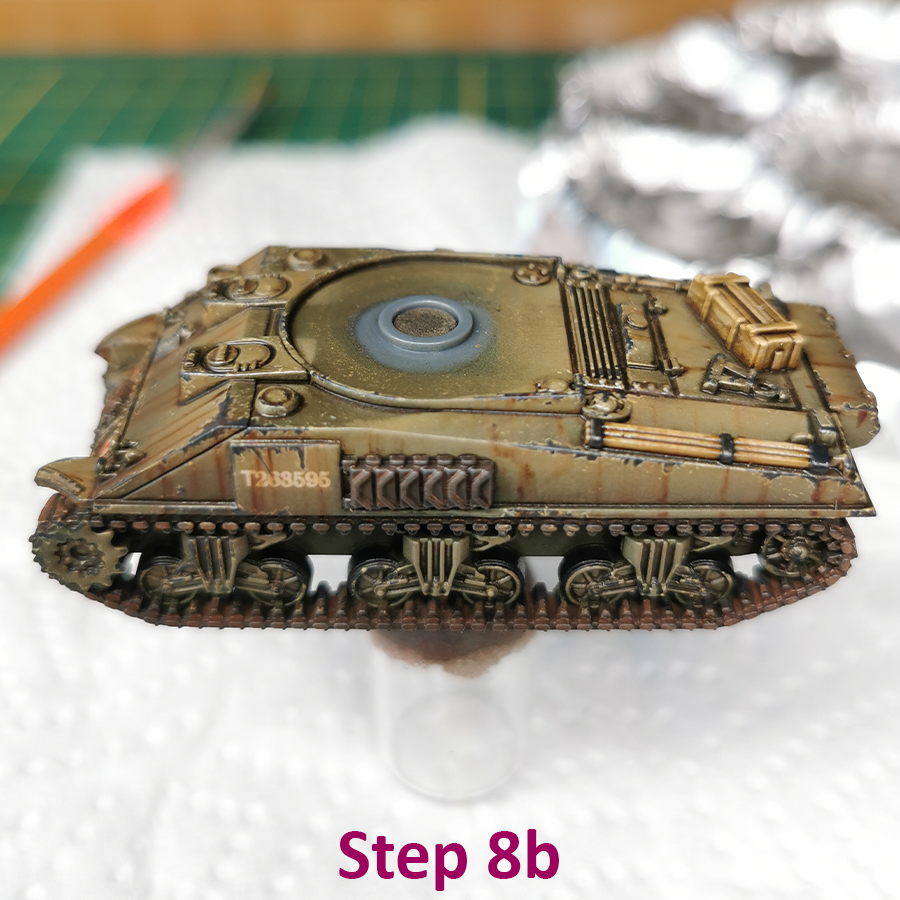
Step 8a: Paint lines of AK streaking grime (AK012) at locations where you expect water to run down.
Step 8b: Repeat with AK Rust streaks (AK013) but focus on the locations where you expect rust deposits, like paint chips in the armor and bare metal.
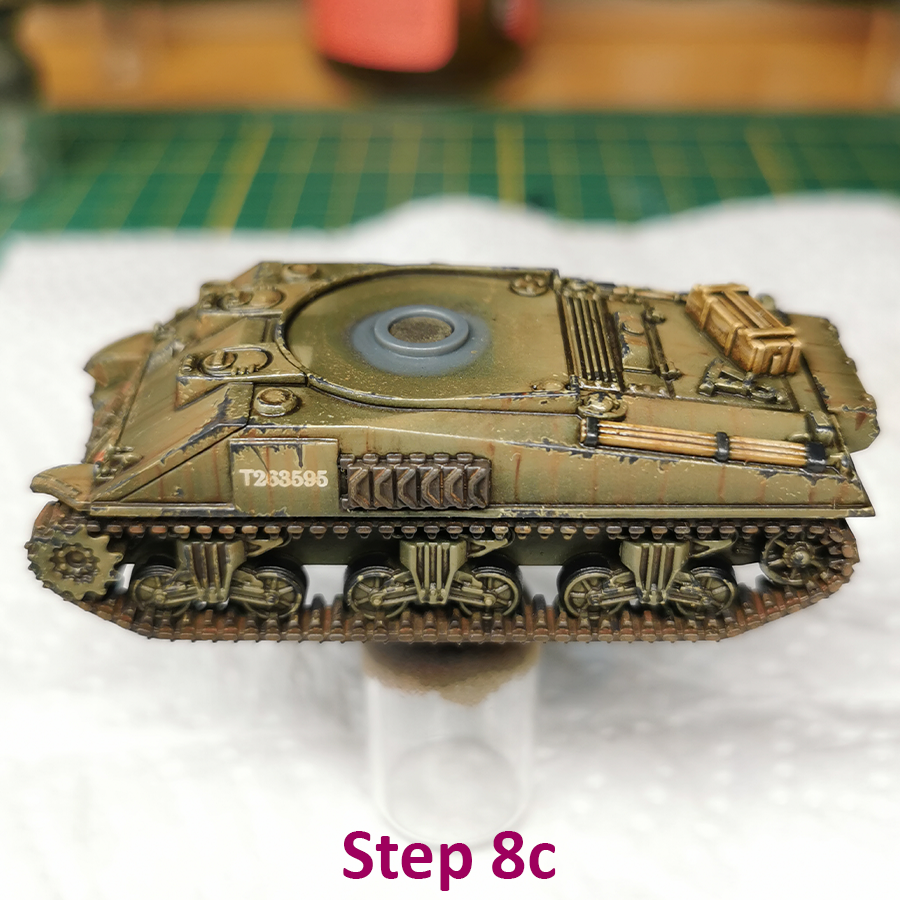
Step 8c: Let this settle for 30 mins, then grab a number of flat brushes and white spirits and fade all the lines vertically downwards. Go around the model 3 times and let the white spirit evaporate in between before deciding to stop there or fade further.
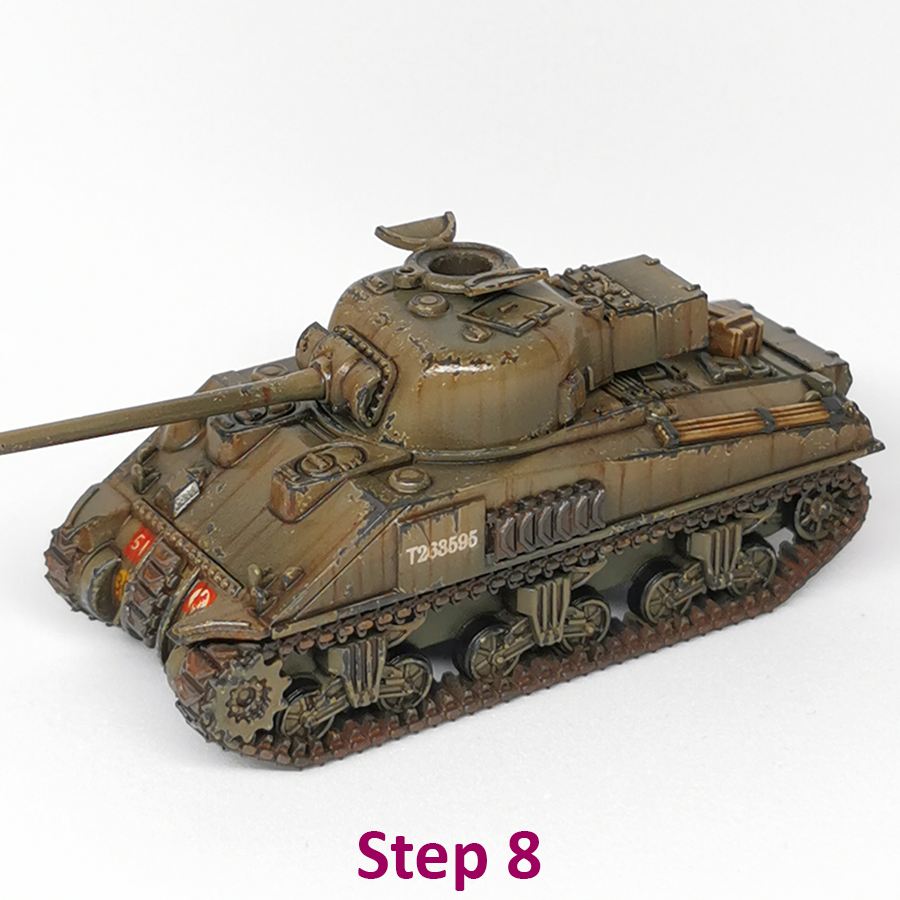
The model should be full of subtle color shifts and details by now, and a Matt varnish would make the model look amazingly real. But we have not added the impact of riding through mud and dust yet.
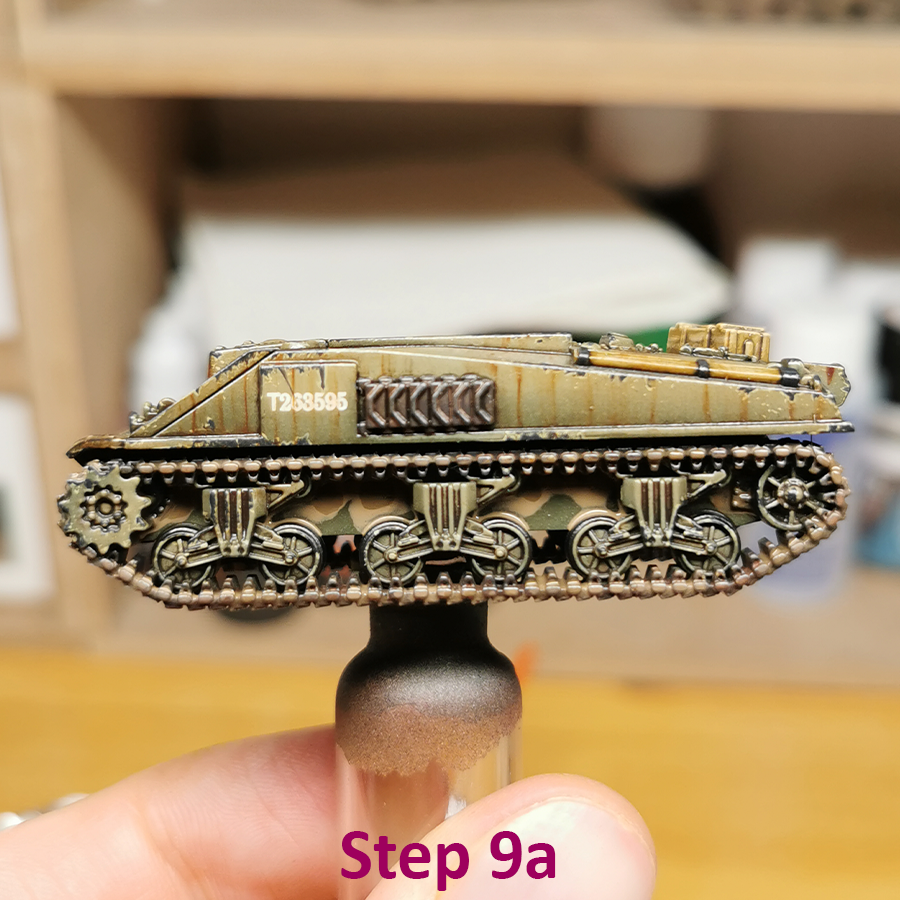
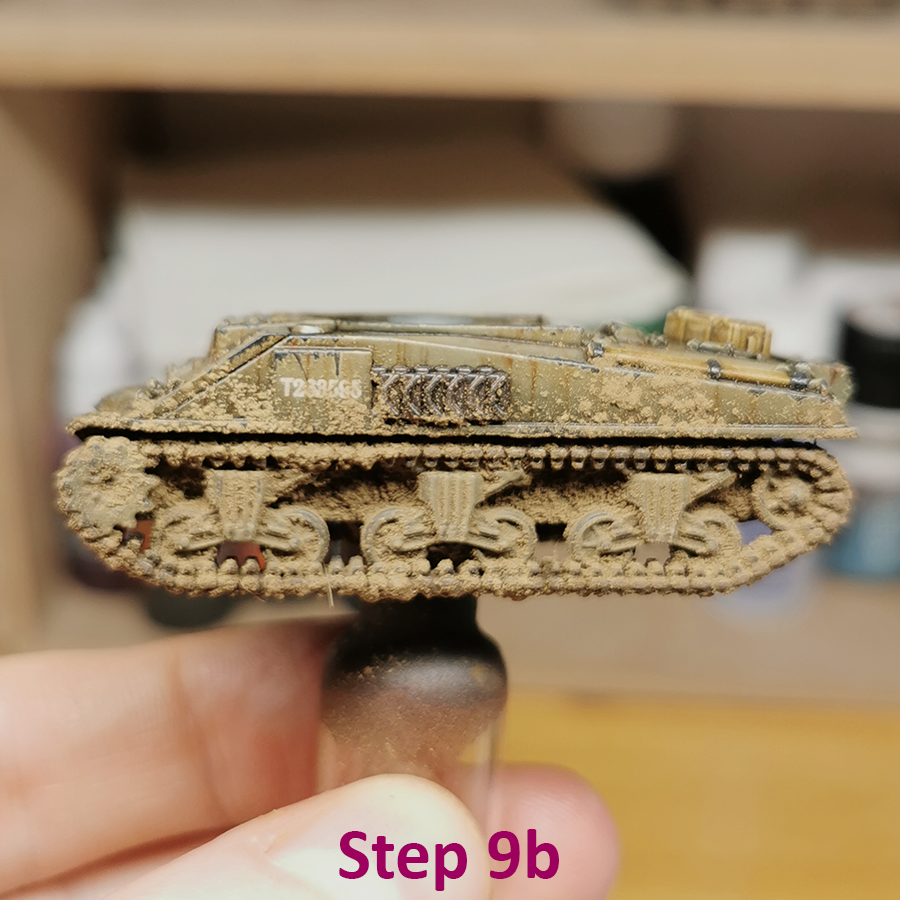
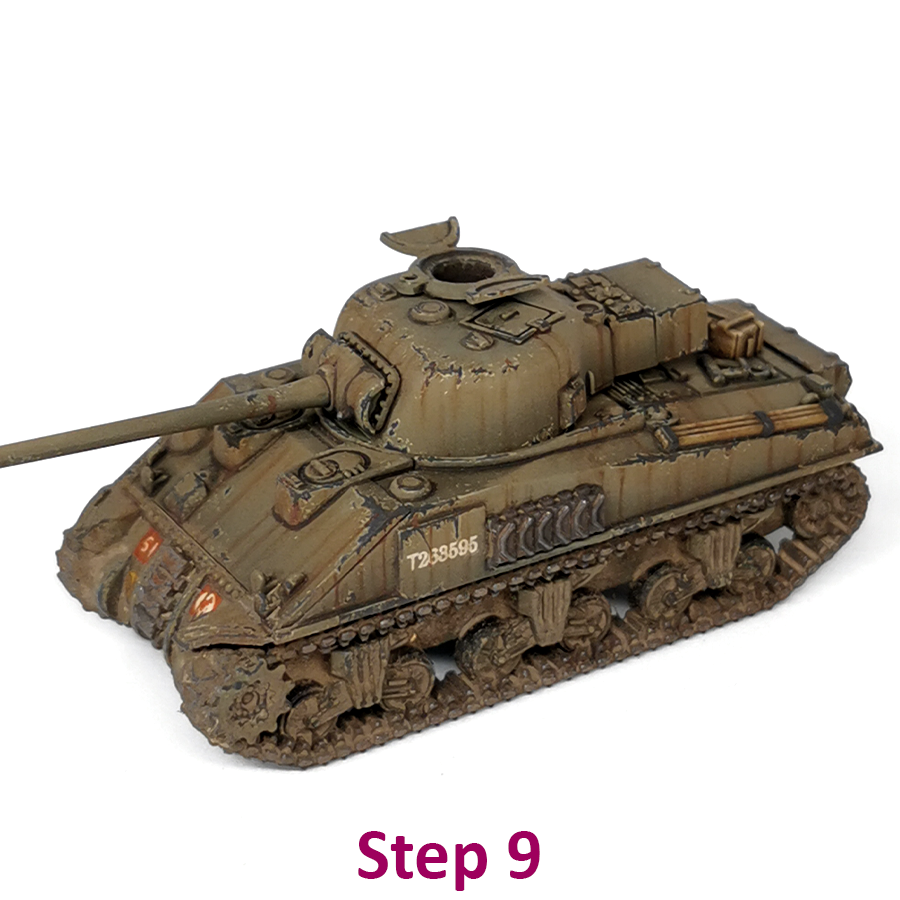
Step 9: Gloss varnish the model one more time (I promise) and bring up the mud and dirt products. I use 2 wet products; AK Brown earth deposits (AK4063) and AK Earth effects (AK017), and also 3 different colors of pigment: Vallejo Natural Umber (73.109), Light Sienna (73.104), and Light Yellow Ochre (73.102). This part is done in one single pass per side of the tank.
Step 9a: First some dabs of Wet enamel product between the roadwheels and on the tracks.
Step 9b: While this is still wet, scoop the darkest pigment over the tracks and roadwheels. Then dust the mid-tone pigment on some random locations to allow for some color variation. Grab an old brush and push the dry pigments into the recesses. Remove some of the dry pigment, tapping it off. Speckle on the lightest pigments and use the brush to clean parts of the roadwheels that would not be covered in mud because of the movement and wear.
Step 9c: Dip a dedicated brush into some AK pigment fixer (AK048) and soak this into the pigment mounts that should remain. The earlier gloss varnish makes it easy to remove any pigment not soaked in the binder, which should turn it into a solid mass of muddly pigment.

I leave this to dry while working down the line of tanks before coming back off the other side of the tank. I usually give this a night to dry and keep applying where I believe the tank might benefit from a bit more dust.
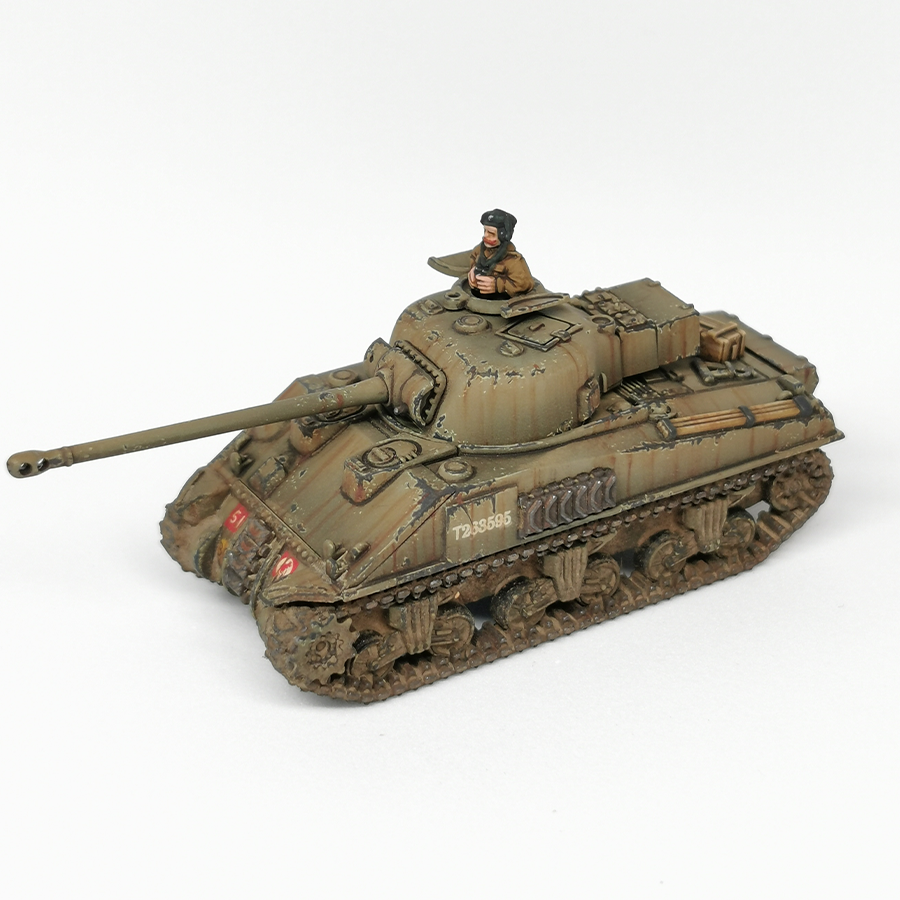
When I’m happy with the intensity of the pigments I cover the entire model in a Matt varnish. This will diminish the intensity of the pigment, but at least protects the model during play, and makes the model look coherent. A final brushing of a graphite pencil against the tracks will bring out the metallic sheen where the mud has polished all the tracks.
Because of the significant drying times and varnish steps, I usually work on a single platoon in one go. Although the process is not fast, it is perfect for painting for 1 or 2 hours every day, usually letting a finished step dry overnight and varnish it the next day before moving on. It is also applicable to any vehicle, from Universal carriers to Churchill Crocodiles and can easily be adapted to other factions and colors.
- Roderick Huijgen aka Meangreenminis on Instagram -
Reacties
Wees de eerste om te reageren...